
Adapted from Martha Stewart

Adapted from Cooking Light.

Adapted from The Recipe Critic.

Adapted from Life As A Strawberry and My Fair Baking
This is part three of a series on school fundraising. Read Part 1: Logistics or Part 2: Collecting Orders
Your fundraiser is almost finished! You’ve done a great job promoting, selling and collecting orders. Now it’s time to wrap up and distribute all those Fair Trade goodies. You’ll receive your order within 10 businesses days of placing it, guaranteed – so it’s important to be ready when everything arrives! Here are some tips to get you organized and prepared to receive, check and distribute your orders.
1. Notify the school treasurer of how much money you collected, how much profit you earned and how much is due to Equal Exchange. Let her or him know that the invoice will arrive with the order.
2. Reserve a safe storage space (one that’s free of rodents and pests!) where you can keep the bulk order until you’re ready to distribute the products.
3. Confirm your order’s arrival date with Customer Service. Then, notify parents, teachers and students.
4. Set aside a few hours to assemble the orders for your school. Recruit a few detail-oriented parent volunteers to help with this step.
5. Set up your space. Make it a party with snacks, drinks and music!
6. Arrange all the products in a line in the order they appear on the order form. Each volunteer will need a paper bag labeled with a student’s name and class, and the student’s order form. Then, volunteers should proceed down the line of products and place items in the bag based on what’s listed on the order form.
7. Recruit volunteers to help distribute compiled orders to homeroom classes.
8. If, on the off chance, someone is unhappy with or wishes to return a product, please call Customer Service to work out a solution.
9. Give teachers about a week to collect any missing/wrong product forms. Once you have those, call Customer Service to sort out what is being returned and what needs to be shipped to you. (Shipping charges may apply if you decide to order extra product that was not left out by our error.)
10. Don’t forget to break down shipping boxes and bring them to the recycling center! And you’re done! Congratulate yourself on a successful fundraiser and thank your volunteers for all their help. Now treat yourself to some delicious fairly traded chocolate and look forward to the great things your fundraiser will make possible!
Looking ahead to your school-wide fundraiser? Get started and find out more about our fundraising program for schools and groups of all sizes.
This is part three of a series on school fundraising. Read Part 1: Logistics or Part 3: Distributing Orders
After the hustle of promoting your school-wide fundraiser and gathering support from your community comes the daunting task of collecting those order forms. The trick to mastering this step is organization and good communication with teachers, staff, students and parents. Here are some things to keep in mind to make this part of the process a breeze.
1. Create a clear timeline and stick to it. Send a memo to teachers and administrators with clear instructions about where and when students should submit their order forms. (Plan deadlines early so you can extend them if you need to!)
 2. Collect and organize orders by class. Give every teacher a collection envelope with their name on it. Ask them to collect the students’ orders and make sure that the amount of money they collect from each student matches their order total. Include a form for teachers to record any missing or extra money alongside students’ names. (Find this form and more on our Tools page.)
For large schools, ask each homeroom teacher to compile the entire class’ orders onto their own Master Order Form. This form can be emailed to you and combined with other classes later.
3. Compile class totals on your Master Order Form. Ask a detail-oriented volunteer to help with this step. If you need any help using the Master Order Form, feel free to contact Equal Exchange staff for help: 776-776-7371.
Don’t forget to double check your final compiled orders against the total number of items ordered and total amount of money collected on each student’s order form.
Find the Master Order Form on our Tools page.
4. Save individual order forms for your records. You will need these order forms to assemble student orders once your bulk order arrives.
5. Submit your final order to Equal Exchange. Send your complete Master Order Form to communityorders@equalexchange.coop. Then, exhale, take a break and wait for your order to arrive!
Looking ahead to your school-wide fundraiser? Get started and find out more about our fundraising program for schools and groups of all sizes.

Yields 30-40 small truffles.
You can also easily halve this recipe for a smaller yield.
Adapted from simplyrecipes.com

Adapted from Food.com
In January 2015, I had the extraordinary privilege of joining an Equal Exchange/PCUSA delegation to Nicaragua. These delegations connect supporters of Fair Trade, and Equal Exchange employees like me, with the people and places that make our products possible. Traveling to this new country, meeting farmers and seeing the co-ops firsthand brought everything I knew about Fair Trade to life. Here’s a look into our week of learning and exploring. Our Nicaraguan coffees are on sale for a limited time, too!
Bienvenidos a PRODECOOP
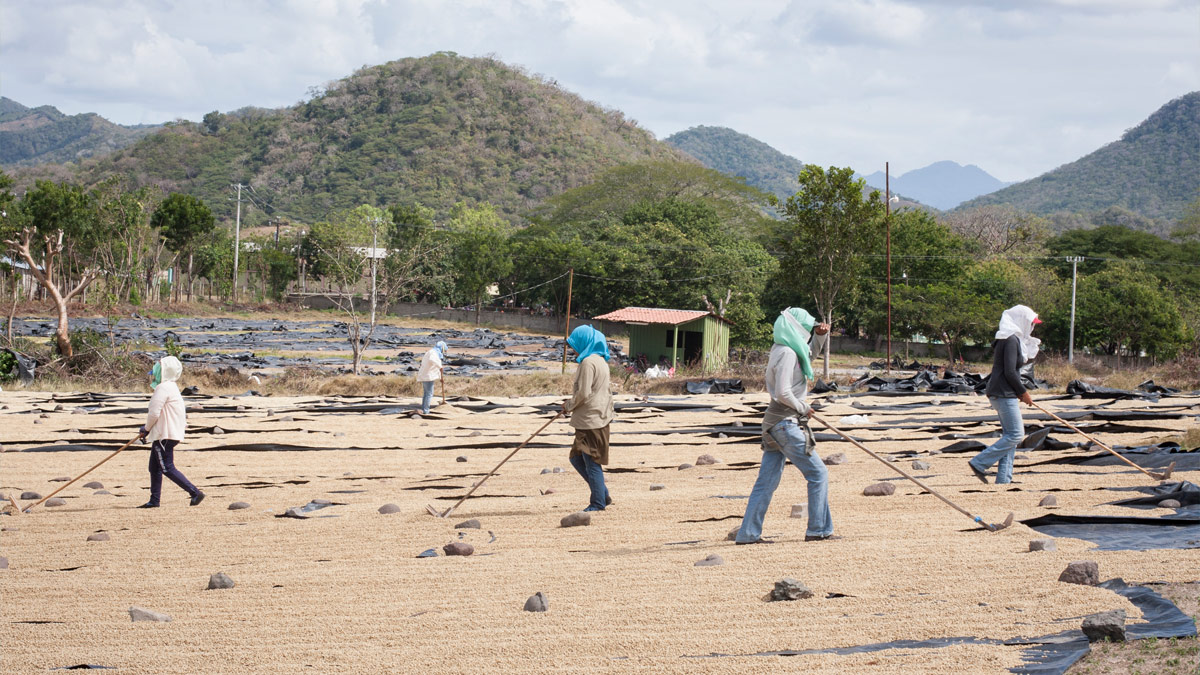
 We arrived in Estelí in the afternoon after a long bus ride from the capital city, Managua. Green volcanic mountains lined the horizon and expansive coffee drying beds spread out ahead of the warehouses of PRODECOOP. It was sunny, hot and lush — a big change from the northeastern winter I’d left behind.
PRODECOOP was Equal Exchange’s first trading partner back in 1986, and now is made up of 38 primary, village-level co-ops, totaling almost 1,000 small-scale farmers. PRODECOOP purchases coffee from each of these primary co-ops, processes it here at the headquarters in Esteli, and then sells 100% of it on the Fair Trade market. Needless to say, it’s a busy place.
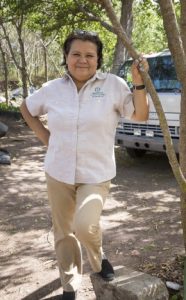
We were welcomed warmly by Adilia Hernández, one of the co-op managers, and Luis Diego Calderón Masís, a gregarious visiting agronomist. The two of them led us on the tour of the premises, giving us a look into the everyday happenings of a busy coffee co-operative.
Drying, sifting and sorting
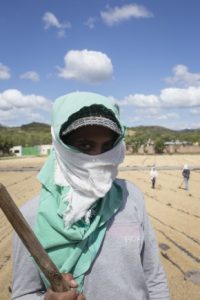 First, we walked through the drying beds, which were hot and overwhelmingly bright, raked continuously by men and women covered head-to-toe to protect them from the sun. We learned that many of the workers are university students working here part-time during school breaks.
Adilia told us that coffee beans take nearly a week to dry out completely, and the raking helps them dry evenly and prevents the growth of mildew. And when it rains? Workers rush to cover the beds with tarps, a process we watched unfold with practiced grace when a sun shower passed through.
Once the beans are dry, they are run through a series of machines that sort defects by size, shape and color— it was actually surprising just how many phases they went through. At the end of it, the reject pile was substantial: full of misshapen, broken or discolored beans that would mean bad-tasting coffee.
Finally, the beans are ready to be bagged, stored in the warehouse until they reach around 18% humidity and then sold on the Fair Trade market. Before it even reaches the roaster, your coffee goes through a lot. The beans that wind up in the bag are really the best of the best.
Roasting, cupping and quality control
 With their commitment to quality, it makes sense that PRODECOOP has their own small-scale roasting operation. Historically, coffee producers have simply grown their crop, sold it and not been concerned with roasting or brewing. By roasting and testing their own beans, members of PRODECOOP gain more knowledge about, and thus control over, their product. And they get pretty amazing coffee out of it, too.
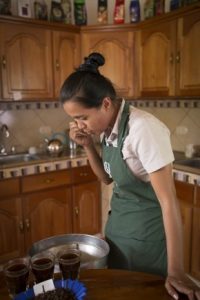
We got to try some of this coffee in their quality control lab with Agueda Emilce Ruiz Avila, who led us in a typical coffee cupping, or tasting. Cuppings are crucial for quality control and cuppers like Agueda are incredibly skilled in identifying nuances in aroma and flavor and understanding their relationship to quality. Agueda walked us through the cupping process and described the way to smell and taste each sample. At the end, we had a unanimous favorite.
Agueda told us that she developed an interest in quality control after working in the drying beds for a few years, but that the taste of coffee took a while to grow on her. Now though? “I love it,” she said. “I drink it all day.”
Manure, microorganisms and compost
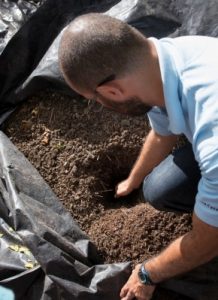 Diego and Adilia led us back behind the drying beds and warehouses, to a shady area where the scent of manure wafted through the warm air. A herd of sheep peered at us through a gate. “This is where we make organic fertilizer,” Adilia told us. Manure, of course, is a key ingredient. Black tarps covered mounds of compost nearby, decomposing into fertilizer in the warm sun.
Healthy farms start with good soil, so the co-op puts a lot of energy into finding ways to maximize soil health. It’s a complex science with many components, from manure to earthworms to microorganisms, not all of which are readily available to the average coffee farmer. However, the co-operative’s investment in organic methods helps make these things more accessible to more farmers. There are many members who need resources, so it’s not always easy to meet the demand, but it’s clear that the effort is being made to share knowledge and resources.
Local coffee and the continuing journey
After the tour, we returned to the patio where I made a beeline for the freshly brewed coffee waiting for us. Despite being 85 degrees outside, the hot coffee was exactly what I wanted. Looking out at the mountains, the palm trees and the tropical plants, I realized what an amazing thing it was to be drinking local coffee. When could I ever say that back home?
Soon, we’d be leaving PRODECOOP behind and driving north to the farms of Dipilto, where the journey of our coffee truly begins.

2 cups milk of your choice
2 Tbsp Equal Exchange Organic Baking Cocoa
2 Tbsp granulated sugar
Dash of cardamom
Dash of ground ginger
Dash of allspice
Dash of ground cloves
Dash of cinnamon
Add all ingredients to a saucepan and stir consistently over low heat for several minutes, until hot enough for your taste. Serves two.